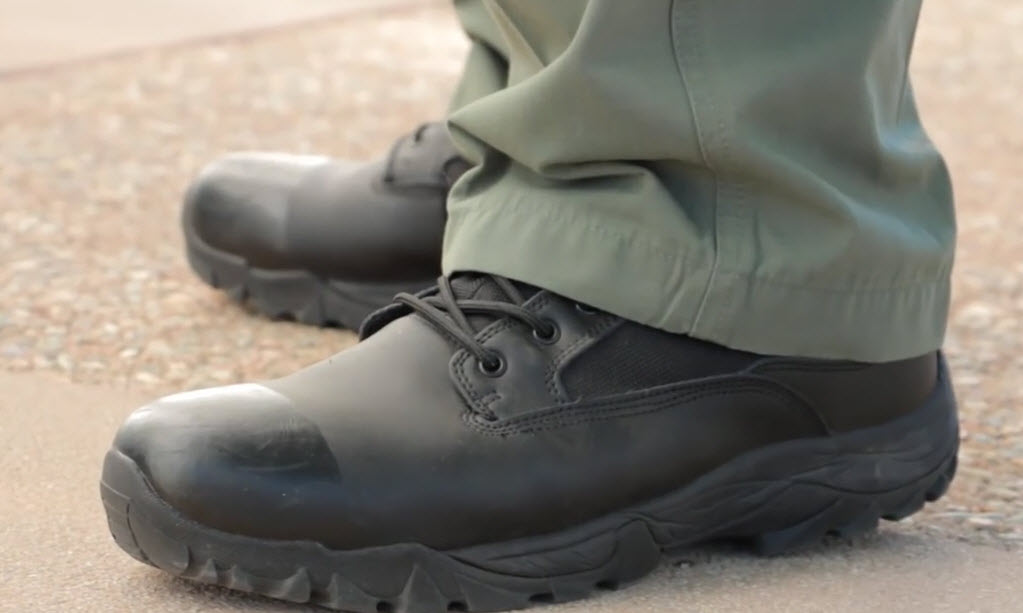
 Gone are the days when police force wasn’t doing much moving during the day. Nowadays, police force is far more flexible as the tasks got incredibly various. The police force today has to be always ready to manage the routing patrolling and to go for a walk out of the station. Let’s not mention the situations when they have to take care of some major robbery or some public tasks. By the time the call is done, you should be already running through the door and last thing you want to do is to put on some special boots. Being ready for the job at all times is fundamental and having the right equipment that checks out on most of the job’s demands is essential. One of the things you need to include is a good pair of tactical boots that are going to handle the challenges that come with the job profile. What’s special about law enforcement boots? At a glance, law enforcement boots are quite similar to the military ones. They’re supposed to be both comfortable and long lasting. They’re made for offering good support for your ankles and feet, no matter how rough the situation gets. They should also be able to protect you from various hazards, not only against the elements. On top of everything else, your boots also need to match the dress regulations, which can put you in the pickle when shopping. On the other hand, the police tactical boots are quite different from the military boots. As military forces do march a lot, while carrying plenty of weight, the military boots are made to take the weight, without compromising on comfort. The load is going to be lighter for most police officers, therefore the obvious differences. The police tactical boots still need to feature good soles that absorb impact very well, while keeping you comfortable standing during the long shift. Don’t forget about the regulations which may lead to always having to pick black boots. The military boots may vary in color, and we all know that sand and brown are common choices for the military boots. Tactical boots give you support Support is what you’re looking for the most on the boots and most of the tactical boots out there are able to do that. You need the tactical boots that are 6 to 8 inches high that sit rather on the lightweight side. Chances are you’re not going to carry more than 100 pounds of gear, so you’re not going to need the heavy-duty build on the combat boots. Tactical boots are going to be just fine. Additionally, you can have your pick between leather, mixed leather and fabric builds, but it’s the rugged build that is going to be more important. Don’t forget about the side zippered tactical boots that save you plenty of time without compromising on the balance or comfort. Now that we’re on it, comfort is always something to look for on your tactical boots. Good cushioning around the top is going to keep tiredness away from your ankles, whereas the waterproof liner is going to protect the inside from the elements. You should never hesitate and spend the extra buck for the waterproof tactical boots, but don’t pass on the water-resistant ones either. Some waterproofing spray may give you a help on that when in need. Tactical boots do sustain traction If you’re a police force in the urban areas, you’re going to need tactical boots that feature sole with sturdy grip on wet concrete or pavement. Some soles are better for loose soil and sand, so you need to choose wisely. You should pay attention and look for a tread with small elements. Additionally, puncture-proof soles and reinforced soles are also going to protect you against common hazards as nails or broken glass. More and more manufacturers out there design and make tactical boots that meet the needs of the law enforcement work and the boots are starting to fit not only the requirements, but also the appearances. Loaded with specific features, these tactical boots offer higher protection against hazards that common for the police officers when out for the job.
0 Comments
 A fundamental principle for surviving into the wilderness is that if it’s going to take you more than a couple of days to track and hunt an animal with a bow and arrow, it’s better for you to not do it in the first place as it’s going to drain out your batteries in the first place.
Just to play it on the safe side, it’s better to scroll down for some cooking tips that are going to help you not only not to starve, but also to remain alive.
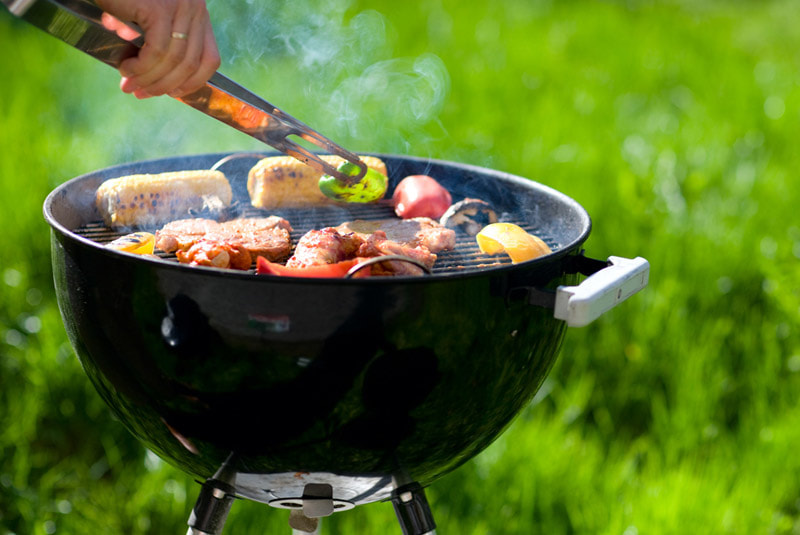
Some food is safe to eat without cooking and fresh water fish is a good example, but you may want to be extra-careful, especially with a fish like catfish. Don’t forget that a cooked meal is also easier for you digest. While in the outdoors, you always want to keep a balance between foraging and preserving your energy, consuming and burning calories. An easy way to cook in the wilderness is to skewer the food and roast it over a fire, but you may also fry the food on a hot rock put over some coals. If you got around 48 hours, you may very well smoke the meat as it going to last longer too, even up to 4 weeks. Want to play it safe? Always boil your food in the outdoors, as long as you have with you a metal container. Additionally, you may also drink the boiled water so you don’t waste any valuable nutrition afterwards.
Even though many may feel banana slugs to be weird to eat as they’re so slimy, you only need to step out of your comfort zone, stick a stick through them and hold them over the fire until the slime comes off. You do need to take the guts out, of course and to always cook them as you also want to kill off the parasites inside them too.
As for the snakes, if you’re not cooking the venomous ones, they are a good option too. You may not like its texture in the beginning as snakes are bit chewy. After all, they’re just a long muscle, but some survivalists out there find them delicious. 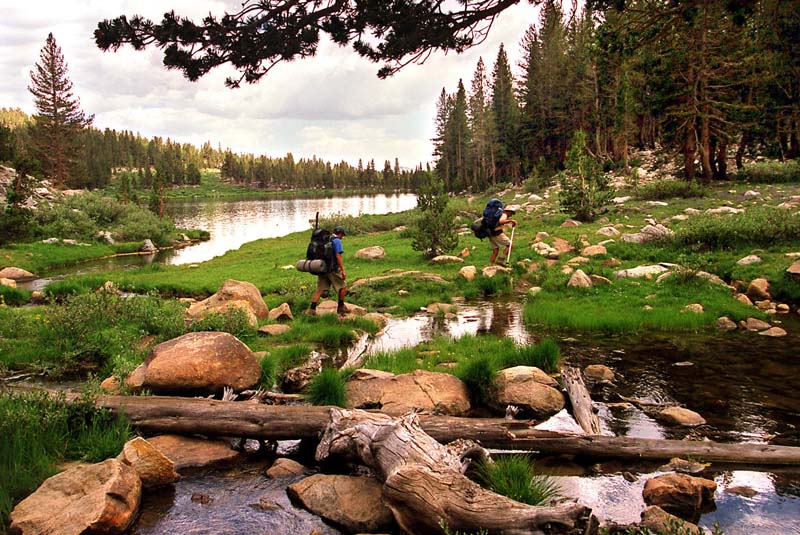 When in need for a new hobby, take a look out the window and enjoy the view. That is, if you have a nature view.
Spending time outside has impressive effect on your health and whether you decide to start hiking, hunting or camping, or anything else related to nature, is a great thing you can do for you and for your body. And if you’re still hesitating whether you should do it or not, here’s a list of effects that nature has on you. And they’re all good, trust us on that.
For instance, one research shows us how students repeated sequences of numbers back a lot more precisely after walking among some trees. Nature is able to restore memory and attention. We also have the study that shows us that people spending time for four days were able to perform better on creative problem-solving test by even 50%. Therefore, we can say there’s a strong link between creative thinking and the outdoors, even though we can’t really say that whether is the exposure to nature or the minimized exposure to technology that caused the improvement, or both.
The anxiety levels and the bad moods decrease as you walk in the forest and it seems that outdoor walks are quite a supplement to existing treatments for depressive disorder. Additionall, if there’s any water involved also, the effects are even stronger.
One study focused on draining the ability to focus of the participants. The subject took a walk in the park afterwards, whereas some walked in the city. There was also the third group that simply relaxed. Once they all came back, the results showed that subjects walking in nature performed the best on a proofreading task. There are many studies that show similar results and you only need to take a peek to nature’s view through your window to focus better. It seems that nature’s effect on attention is so strong that it may help even children with ADHD. They are able to focus better after a 20minutes walk in a park so the conclusion is clear. Spending time in the outdoors may even diminish ADHD symptoms.
The more studies are made, the stronger this conclusion gets: forest environments do have good effects on human immune function. 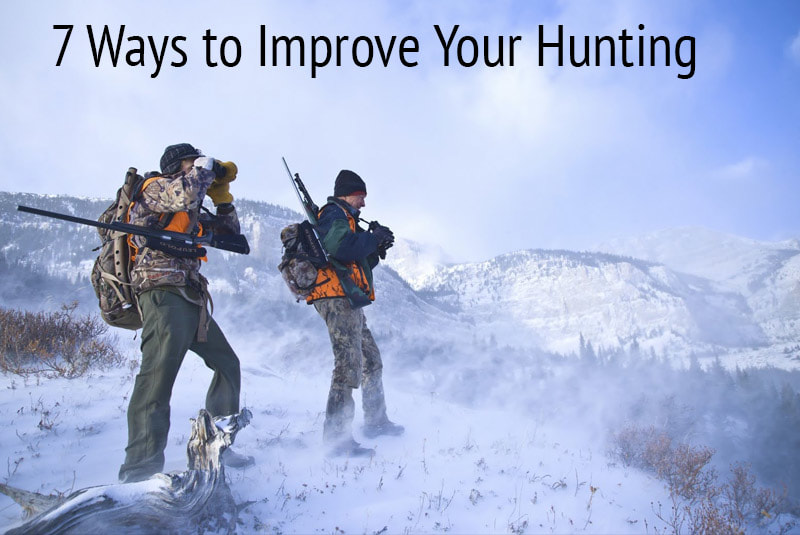 Whether you’re an entry level hunter or you’re simply dedicated and always try to get better at it, you never know too many things when it comes to hunting.
Here are some tips that may help you hunt easier and…improve your hunting skills as well. Needless to say, this won't work when the deer is feeding off a feeder. 1. Move slowly When you’re still hunting, many of use move a bit faster than we should or we may also stay put for too long. You may use your watch for some guidance and set the time you’re standing still for yourself (5 minutes is a good period). This doesn’t mean you can’t stay put longer than that, but it helps you not move for at leas 5minutes. 2. Some quick-step for the deer Deer is very attentive to the human cadence and we do make enough noise through the leaves. You may try to make quick steps in a short sprint for around 20 yards. You may stop and do it again afterwards. Try to be as light as you can as it’s not impossible to sound like a squirrel if you’re putting some effort into it. 3. Go solo You may try, at least from time to time, some alone hunting. Keep the wind at your back as you want to stir deer up and put it on the move. You make a circle and do it again, but chances are deer is already confused by now and not knows anymore where you’re at. You could also sit on the flank of the area you just walked through and wait for a couple of hours. The deer may sneak back in, thinking that you’re already gone. 4. Stop when you get noisy What doesn’t seem important to you, for animal may be an incredible alert for danger. If you’re making a loud noise, best thing to do is to stop and wait long enough. It’s not impossible for a deer to stop and stare in your direction. As long as it doesn’t smell or see you, it may come back to feeding. 5. Appreciate the quarry’s pace It’s a great thing to make an idea about where the animal is going to be once you finished your stalk. Take a good look at the quarry to get a sense about where it’s going to go and its travel rate, whether it’s feeding or simply walking. Choose right your destination. 6. Follow carefully Everytime you’re tracking, keep in mind that your prey is going to be alert. A fresh track means you need to still-hunt and not merely follow your quarry, especially if it’s not “lined out”, but barely picking up some leaves as it goes. 7. Set your landmarks Stalking an animal by creating a big circle and coming up behind is efficient, but it also may become confusing for you too. Therefore, it’s important to choose a particular object on the skyline that you may easily identify from the back. It could be a tree, a rock or a fence line- anything you find easier for you to remember and recognize. 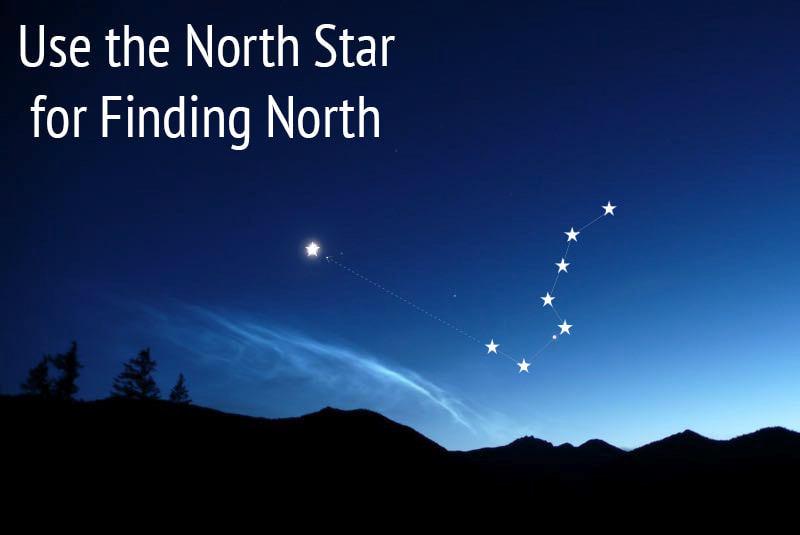 You simply can’t get out there in the outdoors without knowing a thing or two about nature, celestial navigation or how to find water when left without any. As a matter of facts, you do need to study a lot of things about nature and the elements as not only nature may be standing in your way when getting lost, but it may also be your no.1 helper if you do know how to use its clues for your own rescue.
From finding direction by observing the flowers and the trees to finding the North star, you need to develop a whole set of skills that are going to make the difference between surviving and …not surviving when lost in the outdoors. You get a better chance for finding your direction the moment you know how to find the North Star and it’s one of the basic celestial navigation skills that you need in the wilderness. First thing to know is that you can only use the method in the northern hemisphere. As long as the sky is clear, you should be able to rely on the stars, which is why this navigation system is one of the oldest ways you may use. after all, mariners have been using it for thousands of years. The North Star You may figure out where North is in the norther hemisphere by using the location of the North Star. Some also name it the Pole Star and, either way, it’s a precious navigation help as it’s placed almost above the Polar North. Even though the North Star isn’t a very bright star, it doesn’t change its location in the sky, unlike other stars up there. When looking for the North Star, you do need to identify also the Big Dipper (Ursa Major) and Cassiopeia (it’s shaped like a W). These constellations never set and they’re always easy to see on a clear sky, but they may change their place every once in a while. The position of the stars in the sky is connected to the time, date and the geographical position too (latitude and longitude). If you ever looked carefully to the sky at night, you may have noticed by now that stars seem to move across the sky. This is determined by the Earth’s rotation around its axis and this is why the sun is also moving across the sky throughout the day. You should start by finding the Big Dipper in the sky. You may continue by following the edge of the cup 5 times its length, straight to a medium bright star. You just found the North star that is in fact, pointing north. You may also want to play it safe and double check so why not locate Cassiopeia too. The North Star is laying halfway between Cassiopeia and the Big Dipper. Use the sky maps Sky maps are a great tool in the outdoors as they show us the location of stars in the sky at some point in the day, time, the latitude and the longitude of your observing place. If you think the stars are moving across the sky, you’re not far from the trough. This is because the Earth is moving around its axis. It’s also the reason the sun moves across the sky throughout the day too. You may find several types of maps and you need to learn a bit about them and how to use them for your own use. You should start by knowing the latitude and longitude of your location. Once you know your geographical location, you’re ready to create a sky map that is adjusted to your location. As long as you also know how to read a sky map, that is. 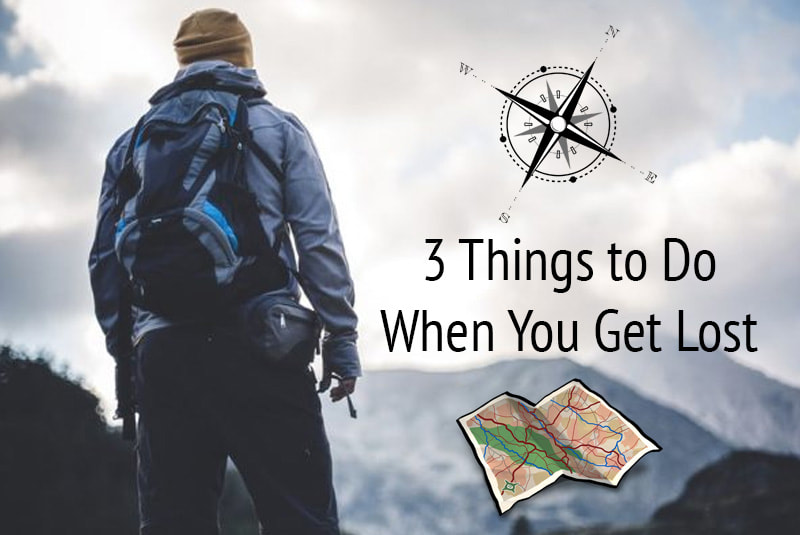 From lighting up a fire to packing the right food for the outdoors, there are almost a million things to know about how to survive in an emergency out there.
Some things you may already know, but it doesn’t hurt to double check so scroll down for a useful list of surviving skills you need.
you should begin with the easiest way, which is to take a look at the sun. as it rises in the east and sets in the west, you may start with some hints from that. You may also use your analog watch to identify the north-south line. You need to hold your watch horizontally and point the hour hand at the sun. the imagined lined between the hour hand and 12 o’clock is the north-south line. As for the daylight savings, you only need to draw a line between the hour hand and one o’clock.
When the moon is crescent, you need to connect its horns with an imagined line that is going to show you a southerly bearing as you extend it to the horizon. Choose a landmark once you’re able to identify your direction so that you may follow it by daylight as well.
The signal fire is a popular and easy way to send a signal but you need to put it in the open for maximum visibility. Try to get to the hilltops or clearings so that nothing (trees, cliff face) is going to disperse the smoke. You need to create a platform to raise the base of your fire from the ground as you don’t want any moisture to saturate the wood. It’s also important to save the best combustible material for the signal fire and get a quick light. As the fire is lit, get a pile of green branches to get a thick smoke. You don’t want a fire for warm, but one that is effective for 15 seconds or so. Another popular way to signal is the mirror signal. It’s incredible how a flash from a signal mirror is visible, even at night, by moonlight, for miles away. You don’t need the store-bought signal mirror and an improvise one is going to work as well. Anything with a reflective surface will do, from a rearview mirror to a cell phone screen. What’s essential is how you’re aiming the reflection and that’s not difficult to do. Keep your peace sign and place your target between your fingers. You need to flash the reflection back and forth, across your fingers. Luckily, for the outdoor adventurist, there are plenty of great options when it comes to tactical flashlights and you only need to give it a thought to decide which one to go with. What to look for? A good tactical flashlight is typical compact and not necessarily small as this may be related to your […] The post Best Tactical Flashlight Brands appeared first on RangerMade. via Blogger Best Tactical Flashlight Brands Luckily, for the outdoor adventurist, there are plenty of great options when it comes to tactical flashlights and you only need to give it a thought to decide which one to go with. What to look for? A good tactical flashlight is typical compact and not necessarily small as this may be related to your […] The post Best Tactical Flashlight Brands appeared first on RangerMade. via Tumblr Best Tactical Flashlight Brands The post Best Tactical Flashlight Brands appeared first on RangerMade. via Blogger Best Tactical Flashlight Brands The post Best Tactical Flashlight Brands appeared first on RangerMade. via Tumblr Best Tactical Flashlight Brands |
My Profile Links
Check our website G+ Profile G+ Page YouTube Blogger WordPress Gravatar Tumblr Diigo Weebly Evernote Getpocket Drive Onenote Newsblur Alternion Paper About.me Instapaper Disqus Foursquare Stumbleupon Slideshare Livejournal Zimbio Jigsy Jimdo Quora Scribd Edocr Bravenet Hubpages Answers Remote Blogdrive Buzzfeed Twitxr Plurk Myspace Trello Pearltrees Xmarks Dreamwidth Soup Bagtheweb Carbonmade Hatena Postagon Myblogu Wallinside Smartican Issuu Linkagoal Ebay Steepster Spnbabble Wanelo Gimmebar Librarything Weheartit Adsoftheworld Getsatisfaction Kiva Slideserve Xmind Intensedebate Angel Speakerdeck Codepen Community Openstreetmap Smashwords Storify Npmjs Wikitechguru Hackerrank Tracky Symbaloo 43marks Smugmug Mysitevote Ryze Bloopist Sketchfab Tapatalk Zotero Cybrhome Goodreads Trepup Etsy Proboards Skyrock Couchsurfing 4shared Blackplanet Gaiaonline 43things Snackwebsites Influenster |
